> For the complete documentation index, see [llms.txt](https://commanderhelp.verifone.com/llms.txt). Markdown versions of documentation pages are available by appending `.md` to page URLs; this page is available as [Markdown](https://commanderhelp.verifone.com/feature-references/features-and-products-references/kitchen-printer/configuring-the-kitchen-printer/configuring-a-business-rule.md).
# Configuring a Business Rule
Once a host has been defined, create and apply a business rule for all PLUs being directed to the kitchen printer. Before defining a business rule, determine what departments contain the PLUs to be directed to the kitchen printer. Also define what PLUs within those departments are food service items.
{% stepper %}
{% step %}
Open Rule Manager
Navigate to Configuration Client > Tools > Rule Manager.
The Rule Manager window displays.

{% endstep %}
{% step %}
Add a rule
Click \[Add] to create a rule.
* Delete: Allows an existing Rule to be deleted.
{% endstep %}
{% step %}
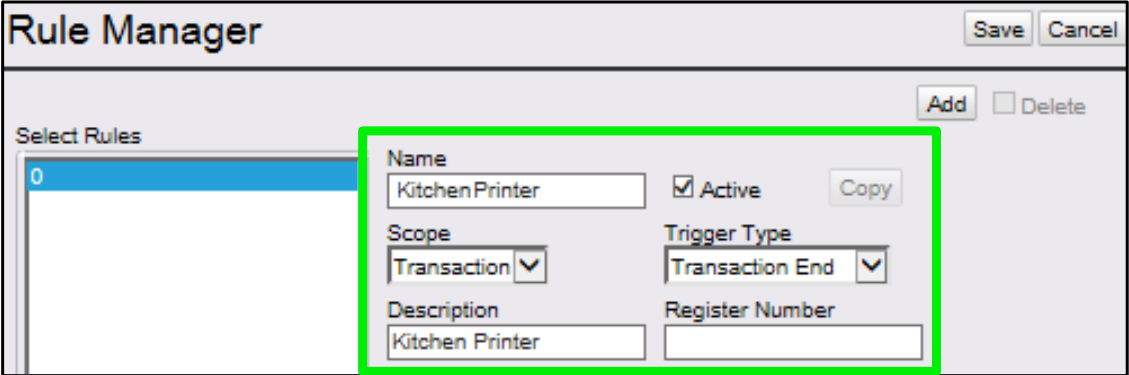
Configure rule parameters
Configure the new Rule parameters.
| Value | Description |
| --------------- | --------------------------------------------------------------------------------- |
| Rule Manager | Sets PLUs that will be sent to the kitchen printer. |
| Name | Enter a unique name to identify the new rule. |
| Active | Select \[Active] to enable the new rule. |
| Scope | Select \[Transaction]. |
| Trigger Type | Select \[Transaction End] as the item that will trigger the rule to be evaluated. |
| Description | Enter an applicable description for the new rule. |
| Register Number | Leave blank. |
| {% endstep %} | |
{% step %}
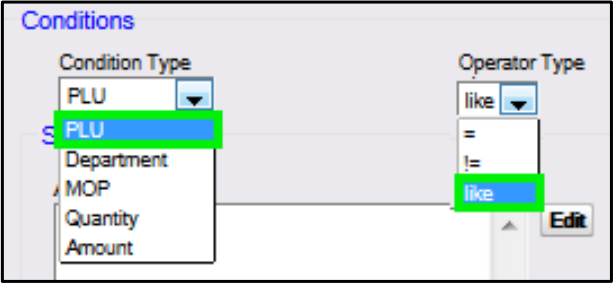
Add conditions
From the Conditions parameters > click \[Add] to add conditions for the rule.
| Value | Description |
| -------------- | ------------------------------------------------------ |
| Conditions | |
| Condition Type | Set \[PLU] to be evaluated when the rule is triggered. |
| Operator Type | Select \[like]. |
| {% endstep %} | |
{% step %}
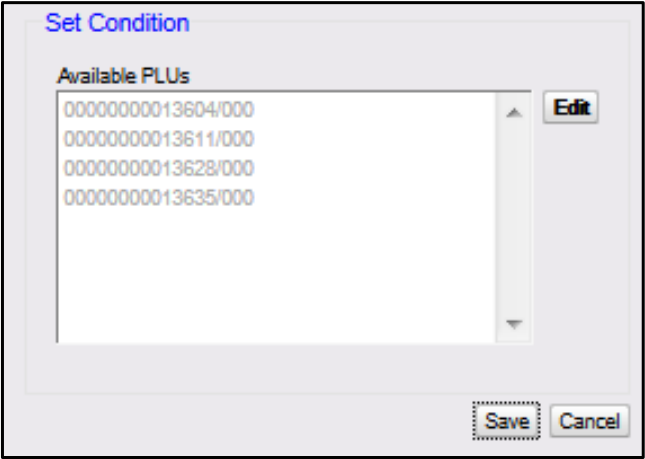
Edit the condition
From the Set Condition parameter > select \[Edit].
The Retrieve PLUs pop up window displays to select PLUs that will trigger the rule and send that PLU to the kitchen printer.
{% endstep %}
{% step %}
Retrieve PLUs by department
If the PLUs have been grouped by departments, retrieve the PLUs by department.
1. Select the \ to which all the food service PLUs are assigned.
2. Select the \[Retrieve Page] option.
{% hint style="info" %}
All food service PLUs assigned to that department will populate the Available PLUs window.
{% endhint %}
{% endstep %}
{% step %}
Select the PLUs
If all PLUs assigned to the department print to the kitchen printer, click \[Select All]. If not, select them individually.
{% hint style="info" %}
Add all food service PLUs, then remove the PLUs that don't apply as part of a modify process. Once the PLUs are added, the display can be sorted by PLU or description to facilitate review. Remove PLUs that don't apply.
{% endhint %}
{% endstep %}
{% step %}
Add the PLUs
Click \[Done] to add PLUs to the Rule.
Click \[Save].
{% endstep %}
{% step %}
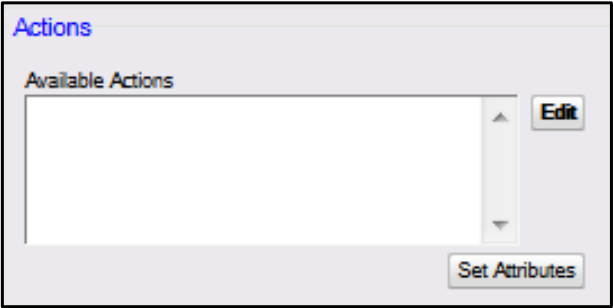
Configure actions
Under the Actions parameter > click \[Edit] to determine the actions that occur when the rule is triggered and the condition evaluates to true.
{% endstep %}
{% step %}
Select the kitchen printer action
**Click \[Enter/Select Kitchen Printer].**
Select \[Done].
Select \[Enter/Select Kitchen Printer].
{% endstep %}
{% step %}
Set attributes
Click \[Set Attributes].
From Set Actions, go to Enter Kitchen Printer.
{% endstep %}
{% step %}
Enter or select the kitchen printer
If a field of 'Enter POS Kitchen Printer' is displayed, type kp.svc.POS into the field and click \[Choose]. 'kp.svc.POS' is the Kitchen Printer ID set within Tools > Managed Modules > Site Controller > Kitchen Printer Service > Kitchen Printer ID field. Once this text field is entered in and selected, it will become a drop down menu after the changes are saved.
If a drop down list is available and the field name shows 'Select Kitchen Printer', select kp.svc.POS from the drop down list.

{% endstep %}
{% step %}
Add and close
Leave all other fields blank. Click \[Add].
Select \[Close].
{% endstep %}
{% step %}
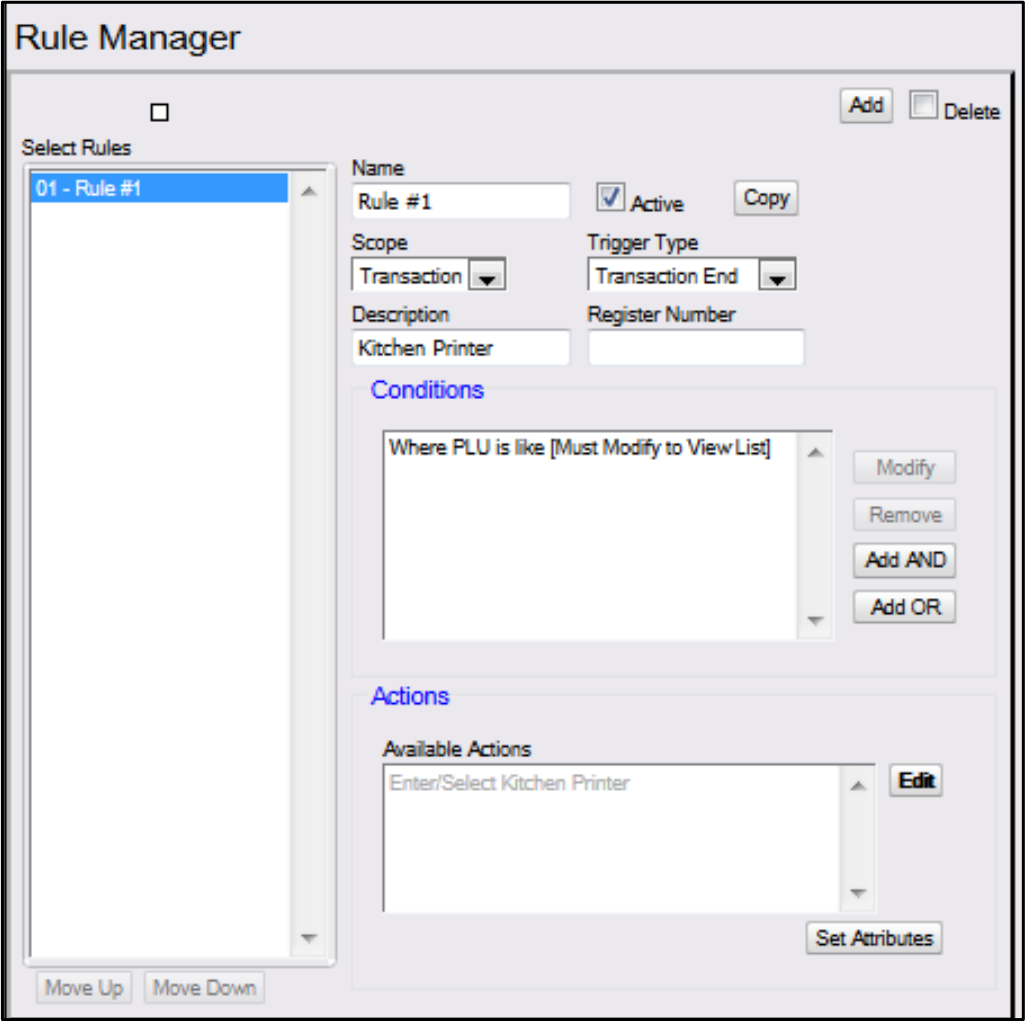
Save the rule
Click \[Save] to accept and finalize all changes, or \[Cancel] to exit without saving changes.
{% endstep %}
{% step %}
Refresh configuration
To apply new settings, go to: Configuration Client > Tools > Refresh Configuration.
{% endstep %}
{% step %}
Finalize and test
{% hint style="info" %}
Log out and back in to all POS terminals after any setting modifications to allow these changes to take affect.
Test a qualifying PLU that should be directed to the kitchen printer.
If there are any issues with the POS terminals, reboot the Commander Site Controller or RubyCi and retest.
{% endhint %}
{% endstep %}
{% endstepper %}
---
# Agent Instructions
This documentation is published with GitBook. GitBook is the documentation platform designed so that both humans and AI agents can read, navigate, and reason over technical content effectively. Learn more at gitbook.com.
## Querying This Documentation
If you need additional information that is not directly available in this page, you can query the documentation by asking a question.
Perform an HTTP GET request on the following URL with the `ask` and `goal` query parameters:
```
GET https://commanderhelp.verifone.com/feature-references/features-and-products-references/kitchen-printer/configuring-the-kitchen-printer/configuring-a-business-rule.md?ask=&goal=
```
`ask` is the immediate question: it should be specific, self-contained, and written in natural language.
`goal` is what the user is ultimately trying to achieve, the reason they need the answer. Sharing it helps GitBook give you a better, more relevant answer. A goal is most helpful when it describes the outcome the user wants rather than restating the question. For example, with `ask=how do I create an API token`, a goal like `automate deployments from our CI pipeline` lets GitBook tailor the answer to that use case.
The response will contain a direct answer to the question and relevant excerpts and sources from the documentation.
Use this mechanism when the answer is not explicitly present in the current page, you need clarification or additional context, or you want to retrieve related documentation sections.

 | Value | Description |
| --------------- | --------------------------------------------------------------------------------- |
| Rule Manager | Sets PLUs that will be sent to the kitchen printer. |
| Name | Enter a unique name to identify the new rule. |
| Active | Select \[Active] to enable the new rule. |
| Scope | Select \[Transaction]. |
| Trigger Type | Select \[Transaction End] as the item that will trigger the rule to be evaluated. |
| Description | Enter an applicable description for the new rule. |
| Register Number | Leave blank. |
| {% endstep %} | |
{% step %}
Add conditions
From the Conditions parameters > click \[Add] to add conditions for the rule.
 | Value | Description |
| -------------- | ------------------------------------------------------ |
| Conditions | |
| Condition Type | Set \[PLU] to be evaluated when the rule is triggered. |
| Operator Type | Select \[like]. |
| {% endstep %} | |
{% step %}
Edit the condition
From the Set Condition parameter > select \[Edit].


 Click \[Save].
{% endstep %}
{% step %}
Configure actions
Under the Actions parameter > click \[Edit] to determine the actions that occur when the rule is triggered and the condition evaluates to true.
 {% endstep %}
{% step %}
Select the kitchen printer action
**Click \[Enter/Select Kitchen Printer].**
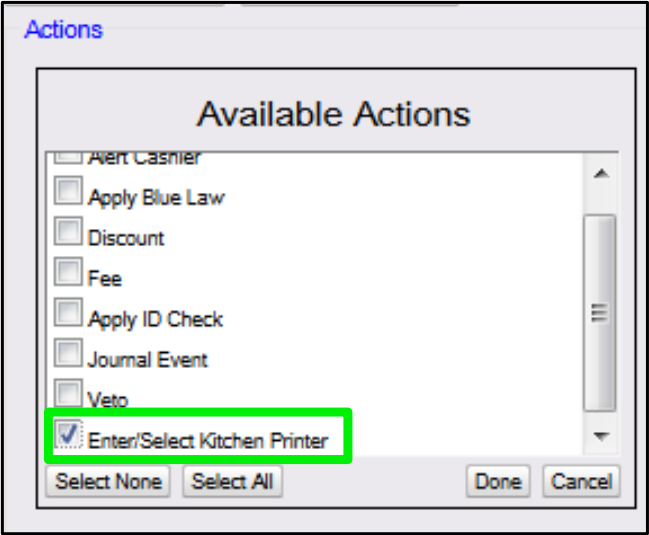 Select \[Done].
Select \[Enter/Select Kitchen Printer].


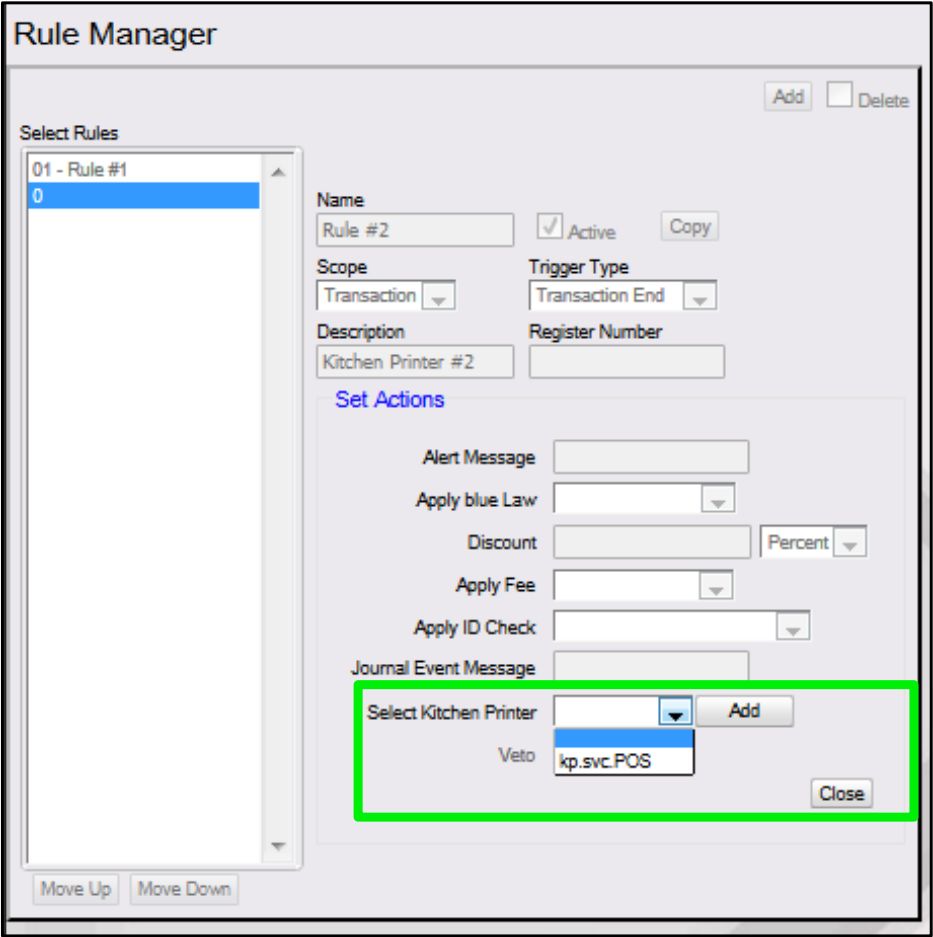 {% endstep %}
{% step %}
Add and close
Leave all other fields blank. Click \[Add].
Select \[Close].
{% endstep %}
{% step %}
Save the rule
Click \[Save] to accept and finalize all changes, or \[Cancel] to exit without saving changes.
 {% endstep %}
{% step %}
Refresh configuration
To apply new settings, go to: Configuration Client > Tools > Refresh Configuration.
{% endstep %}
{% step %}
Finalize and test
{% hint style="info" %}
Log out and back in to all POS terminals after any setting modifications to allow these changes to take affect.
Test a qualifying PLU that should be directed to the kitchen printer.
If there are any issues with the POS terminals, reboot the Commander Site Controller or RubyCi and retest.
{% endhint %}
{% endstep %}
{% endstepper %}
---
# Agent Instructions
This documentation is published with GitBook. GitBook is the documentation platform designed so that both humans and AI agents can read, navigate, and reason over technical content effectively. Learn more at gitbook.com.
## Querying This Documentation
If you need additional information that is not directly available in this page, you can query the documentation by asking a question.
Perform an HTTP GET request on the following URL with the `ask` and `goal` query parameters:
```
GET https://commanderhelp.verifone.com/feature-references/features-and-products-references/kitchen-printer/configuring-the-kitchen-printer/configuring-a-business-rule.md?ask=